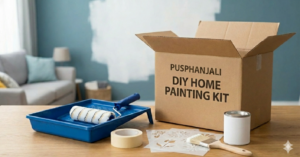
DIY PAINTING KIT
Transform Your Home with Ease: The Ultimate Guide to Using Painting Kit
Giving your home a fresh look doesn’t have to be a stressful or expensive ordeal. With the right DIY painting kit, you can achieve professional-grade results on your own timeline while saving significantly on labor costs. Whether you are looking to refresh a single accent wall or renovate an entire apartment, having a curated set of tools ensures that the process is smooth, clean, and highly satisfying.
Why Choose a Self-Painting Kit for Your Next Project?
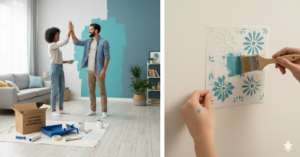
Many homeowners hesitate to paint because they fear the mess or believe they lack the skills of a professional. However, a Self Painting Kit is the perfect DIY solution for home wall painting without hiring a professional painter. These kits are designed specifically for beginners and enthusiasts alike, providing everything needed to manage paint flow and edge precision.
Benefits of Using a Professional-Grade DIY Painting Kit
Investing in a comprehensive kit rather than buying individual, mismatched tools can make a world of difference. Here is why DIY enthusiasts prefer a complete setup:
Cost-Effectiveness: Hiring professional painters involves high labor charges; a kit pays for itself in just one room.
Time Efficiency: High-quality rollers and brushes hold more paint, reducing the number of trips to the paint tray.
Ease of Use: This easy-to-use kit includes essential tools that help you paint walls neatly, quickly, and affordably.
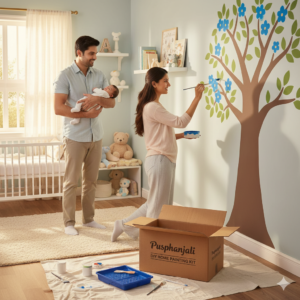
Versatility: It is ideal for homes, offices, and rental properties where a quick refresh is often needed.
Achieving Smooth Finishes Without the Mess
One of the biggest hurdles in DIY painting is “splatter.” Modern kits feature microfiber rollers and drip-guard technology that keep your floors clean. When you use a DIY painting kit, the tools are engineered to work together, ensuring that the texture on the wall remains consistent from the first stroke to the last.
Essential Tools Included in Your Painting Kit
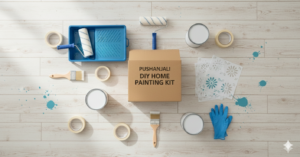
To get the job done right, you need more than just a brush. A high-quality kit typically includes:
1. High-Density Pressure Rollers
The backbone of any painting project is the roller. Look for rollers that offer even distribution to avoid streaks. These allow you to cover large surface areas in minutes rather than hours.
2. Precision Edgers and Corner Tools
Corners are where most DIY jobs fail. Specialized edging tools included in a DIY painting kit allow you to paint right up to the ceiling or baseboard without using messy masking tape.
3. Extension Poles and Paint Trays
To avoid back strain and the constant need for ladders, extension poles are vital. A sturdy tray with a textured surface helps load the roller evenly, preventing “fat edges” on your walls.
Step-by-Step Guide: How to Paint Your Walls Like a Pro
Surface Preparation
Before opening your DIY painting kit, ensure the walls are clean. Dust and grease can prevent paint from adhering properly. Use a damp cloth to wipe down the surfaces and fill any small holes with putty.
The “Cutting In” Technique
Start by using the smaller brushes or edgers from your kit to paint the perimeter of the wall. This is called “cutting in.” By doing the edges first, you create a buffer zone for the larger roller.
Mastering the Roller Stroke
For a flawless finish, apply paint in a “W” or “N” pattern. This technique ensures even coverage and helps blend the paint into the wall. Your DIY painting kit roller should glide easily; never press too hard against the wall, as this can cause drips.
Maintenance and Care for Your DIY Painting Kit
To ensure your tools last for multiple projects, proper cleaning is essential.
Water-Based Paints: Simply wash your brushes and rollers with warm, soapy water immediately after use.
Drying: Hang brushes by the handle so the bristles don’t bend, and stand rollers upright to maintain their shape.
Storage: Keep your DIY painting kit in a cool, dry place to prevent the metal components from rusting and the rollers from hardening.
Frequently Asked Questions (People Also Ask)
Q1: Can a beginner really get a professional finish with a DIY painting kit? Yes, modern kits are designed with ergonomic handles and high-quality fibers that mimic the stroke of a professional. If you follow the “W” pattern and prepare your walls, the results will be seamless.
Q2: Is it cheaper to buy a kit or individual tools? Buying a DIY painting kit is almost always more affordable. Bundled tools are priced lower than individual items, and you are guaranteed that the roller covers will fit the frames perfectly.
Q3: How many rooms can I paint with one kit? With proper cleaning and care, a high-quality kit can last for 5 to 10 full-room projects. You may only need to replace the inexpensive roller sleeves over time.
Q4: Do I need to use masking tape if I have a precision edger? While precision edgers significantly reduce the need for tape, we still recommend using it on delicate surfaces or intricate moldings for the cleanest possible lines.
Conclusion
Taking pride in your home starts with the walls that surround you. By choosing a DIY painting kit, you take control of your environment, save money, and ensure a high-quality finish that reflects your personal style. From rental apartments to permanent offices, these tools provide the freedom to renovate whenever inspiration strikes.
Ready to start your home transformation? Get the best tools delivered to your doorstep and start painting today!
📞 संपर्क करें
PUSHPANJALI ENTERPRISES 📍 पता: 123, Raisan North Haldaur Distt. Bijnor Uttar Pradesh 📞 फोन: 07037044001, 09760474001 📧 ईमेल: pushpanjalienterprisesindia@gmail.com 🌐 वेबसाइट: www.pushpanjalienterprises.co.in 📲 व्हाट्सएप ऑर्डर सपोर्ट उपलब्ध: https://wa.link/rnl5tz